 |
Free Electron
|
|
Free Electron
|
This document presents a step by step description of how to add a simple plugin module in a new module set.
These described files may be provided in the distribution, but are presented here as though we are writing them from scratch. There may also be other modules in the sample module set.
It should help the read the Component Writer's Guide prior to walking through this example.
We will create a new plugin module called "sample_text" in a new "sample" module set. Normally, we would not prefix the module name with the name of the module set, but since "text" is a pretty generic name, we will leave the short version to be used by some future module.
Here are the files we will create:
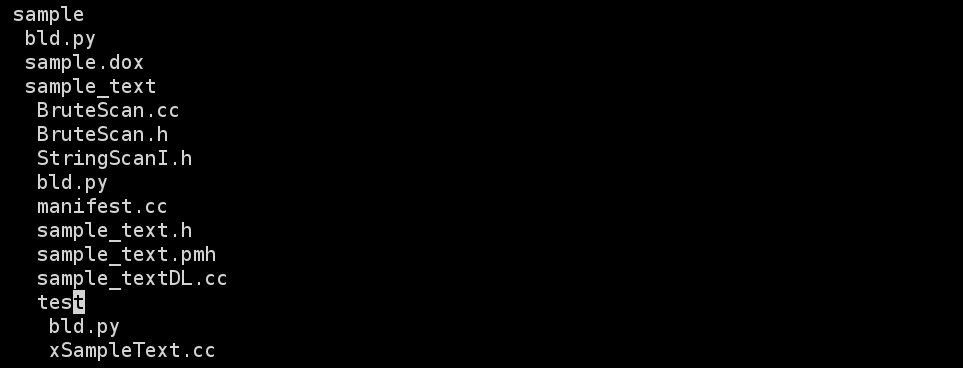
First, we create a directory 'sample' under FE root path, peer with the src/ and ext/ directories in the distribution.
In this directory, we create 'bld.py' which will make all this directory's subdirectories potentially available to the build system as modules.

Since we are not doing anything special, this is rather simple. The two strings are for logging during the build, an adjective and a title.
We also need to a file to add a doxygen group to list any sample modules separately from the other modules.

For our example, we a making a tool that takes a string and reports various metrics on what it finds. You would call analyze() to present a string and then use the other four functions to measure something.
We use doxygen markup to describe the class and its methods.
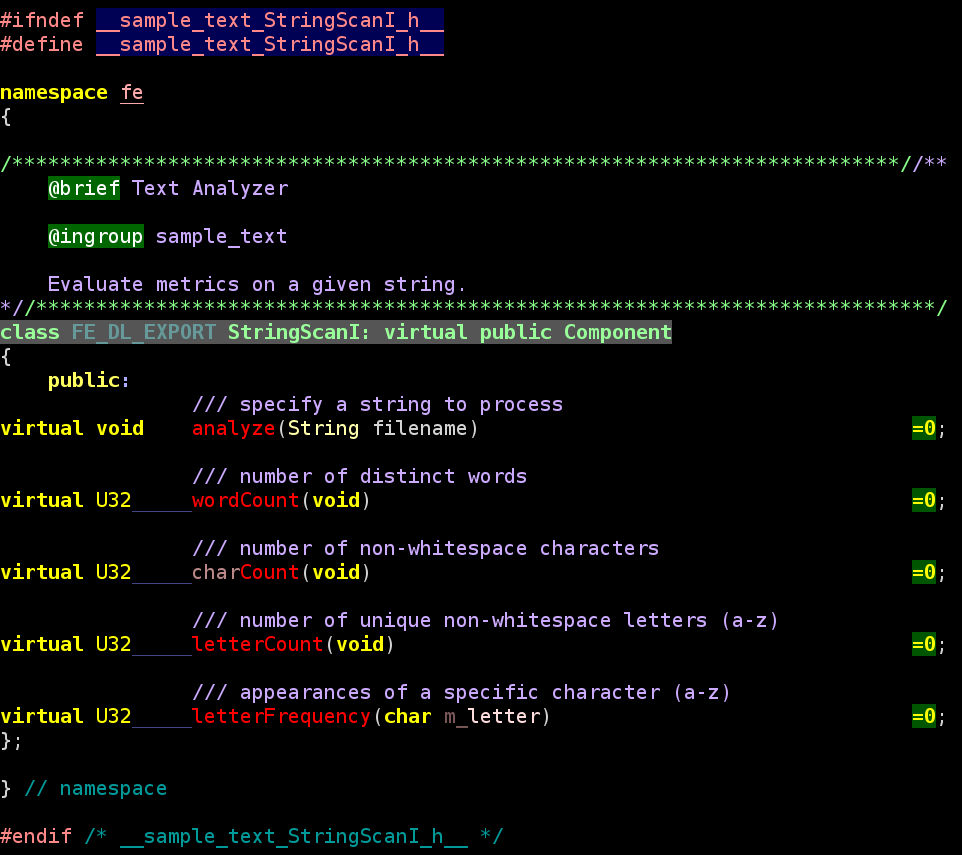
Interfaces generally always derive from fe::Component, or from one or more other interfaces. Since we can have multiple inheritance from classes which all derive from common interfaces, or from fe::Component directly, it is important to use virtual inheritance when dealing with interfaces.
We need to provide at least one functional back end of our interface. We add an implementation of StringScanI called "BruteScan".
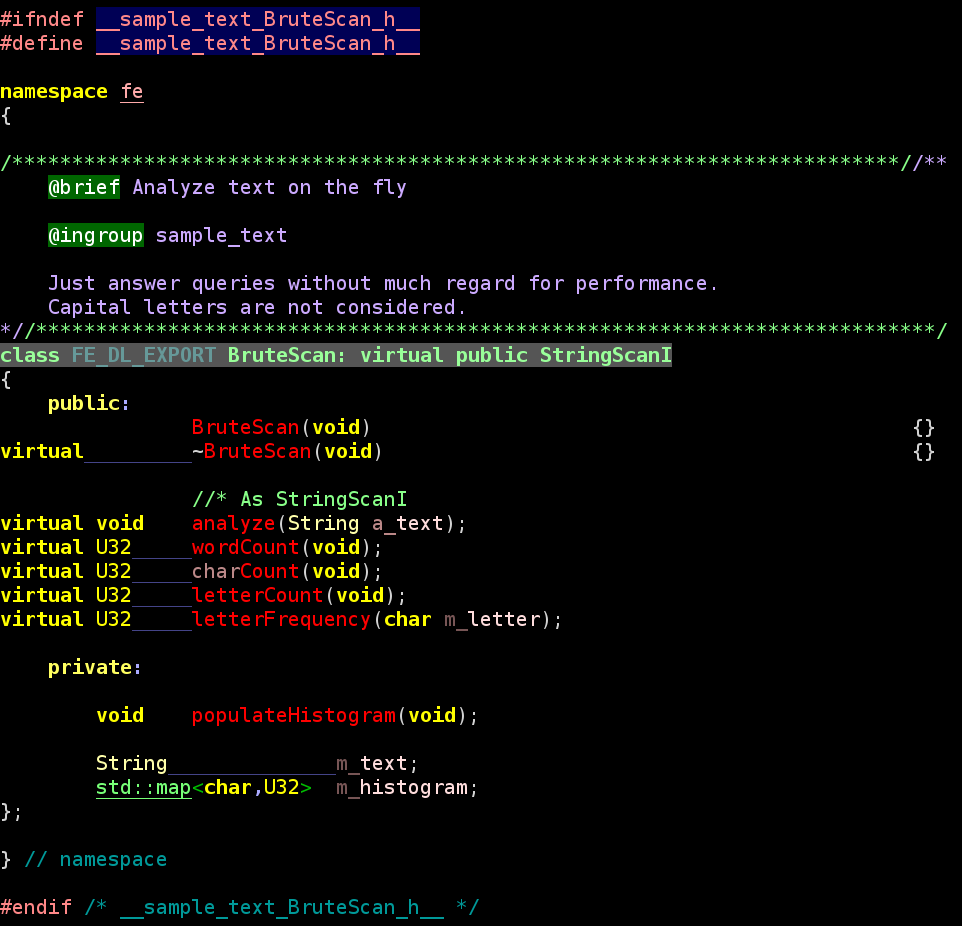
The implementation class derives from the interface. An implementation could derive from multiple interfaces, if it wishes to present itself in multiple contexts.
If we needed to have a post-constructor to initialize things that we can not touch during the regular constructor, we can derive from fe::Initialize and add an initialize() method (see fe::Initialized).
Since this walkthrough is about plugins and not string parsing, it's not that important to read through the implementation details, but here they are for completeness.
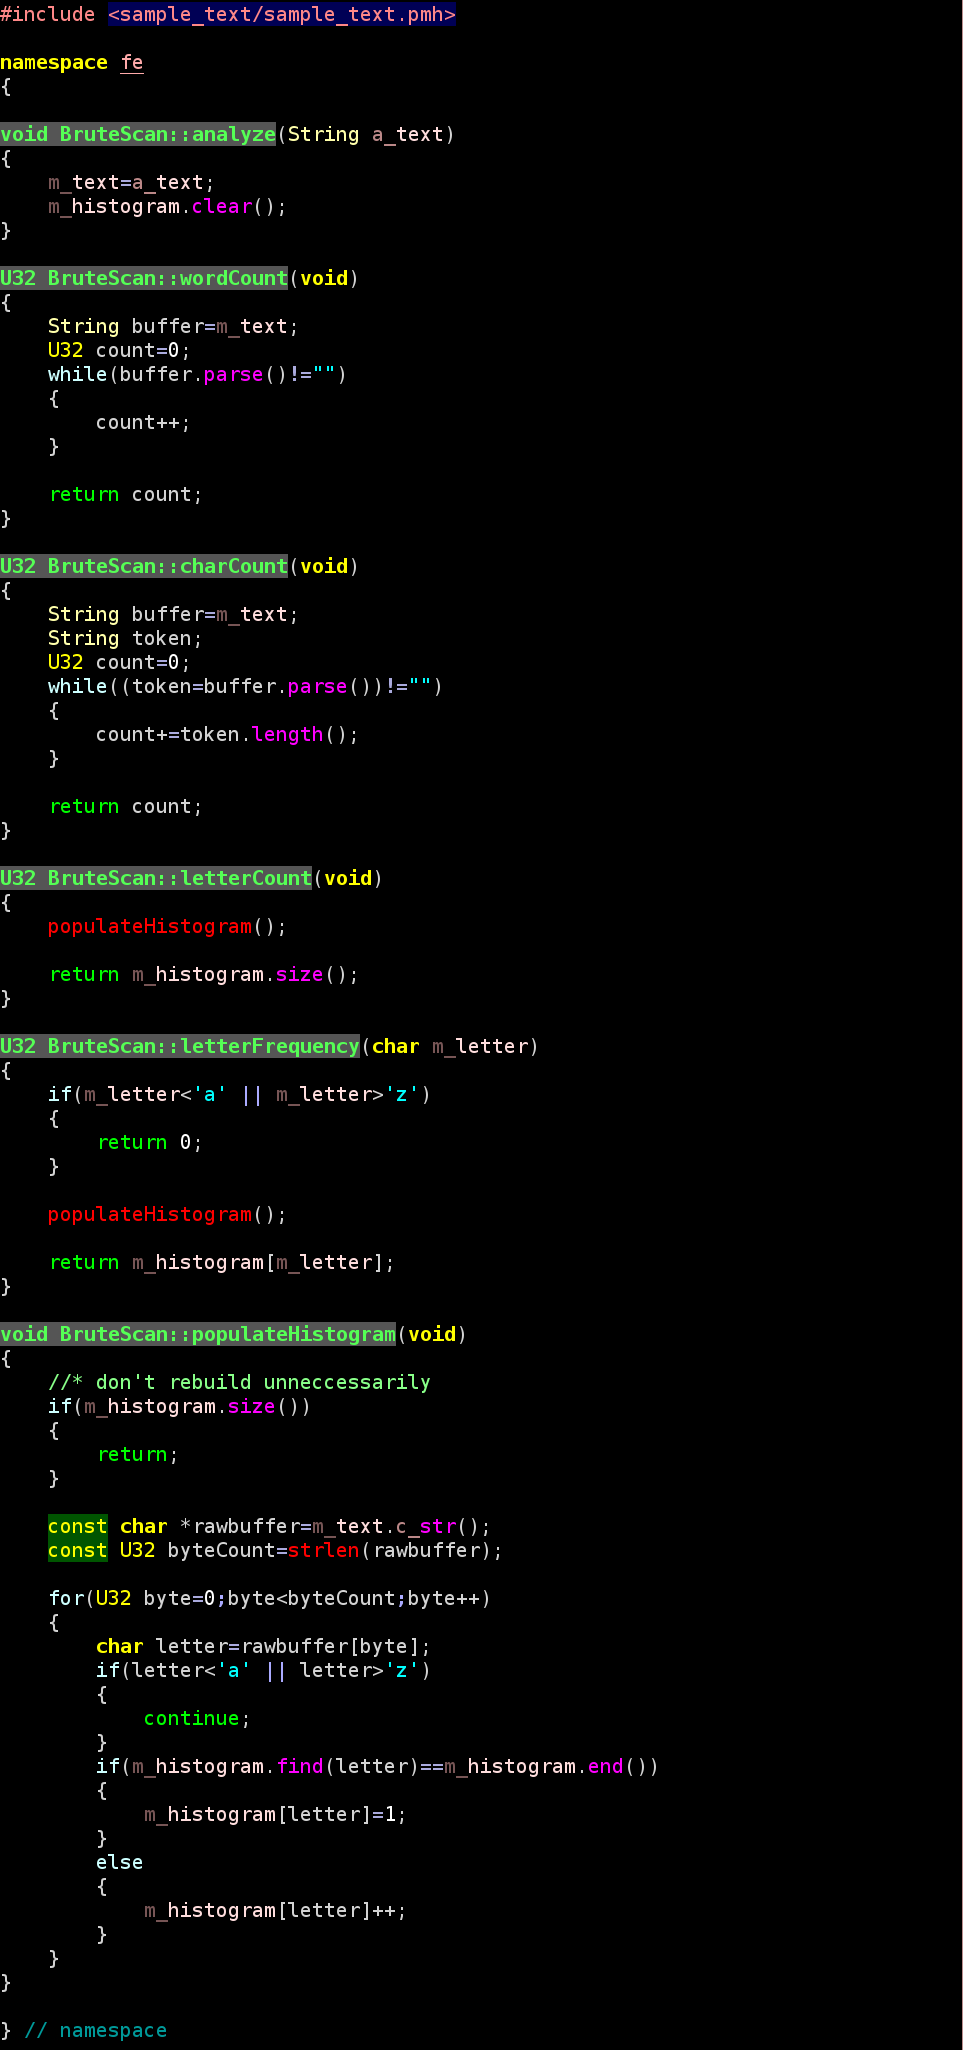
An inheritance graph shows all the classes that our implementation derives from.

In addition to the algorithmic code shown above, we also need a little bit of boilerplate to make sure everything is easily accessible in the running system.
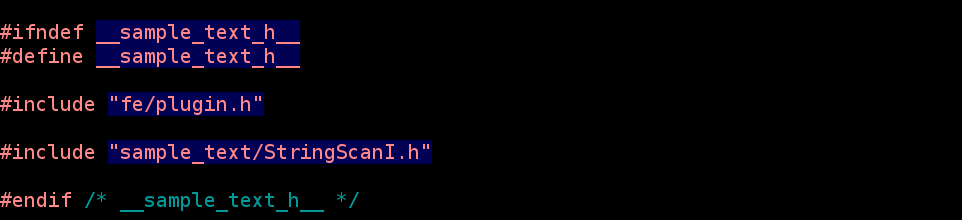
The are two headers commonly seen in every module, although they are both optional. The regular '.h' is the "public" collective header while the ".pmh" file is a "private master header".
The public header usually contains includes to the interfaces in the modules as well as dependencies that any source using the module would almost necessarily need.
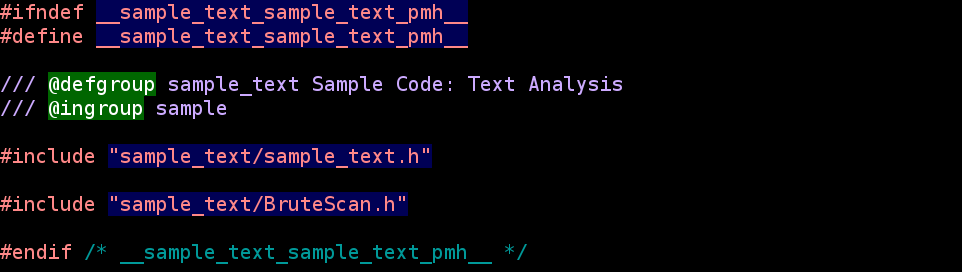
The private master header usually includes the public header and then also includes the implementations in the module. A module would not be expected to include another module's private master header unless it is deriving from and extending an implementation in that other module.
Using these collective headers instead of expecting all source files to pick out a long list of specific headers not only simplifies the coding process, it allows per-module precompiled headers, which can greatly speed up compile times.
Each module needs a C++ file to tell the fe::Registry what components it has available, as well as what interfaces those components fulfill.
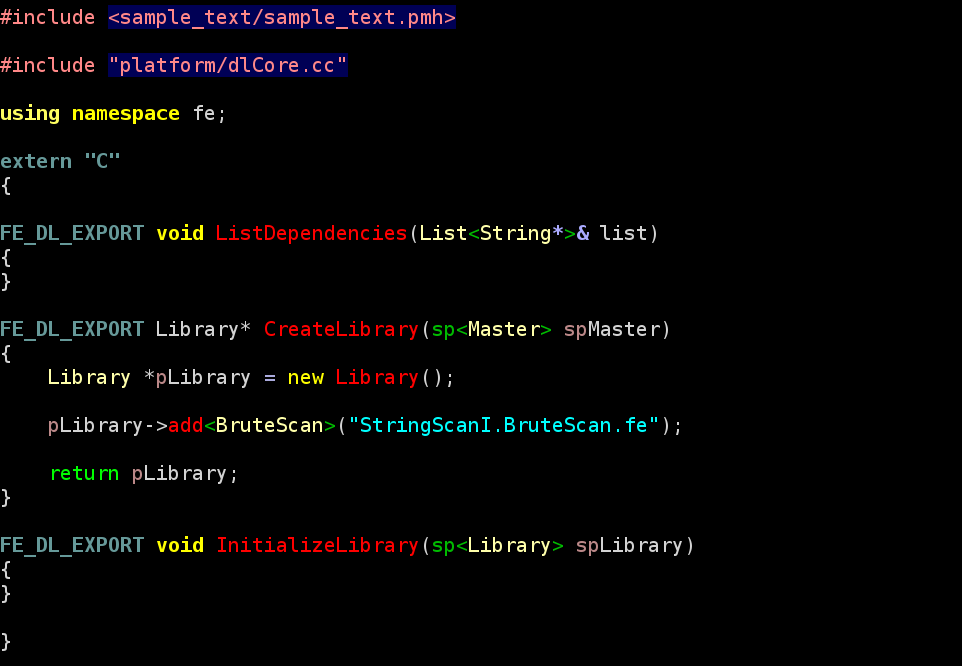
In this simple module, ListDependencies() and InitializeLibrary() are not actually needed and could have been omitted.
The ListDependencies() function populates a list of other modules that this module will need to have loaded first. You don't have to list the modules that those modules are dependent on, and so forth, since the loader system will already make sure those prerequisites are resolved first.
The InitializeLibrary() function is sort of a post-constructor for libraries. This is commonly used to adjust priorities when multiple components may be able to match a particular creation request.
During the CreateLibrary() function, the library is explicitly created. All component implementations that we wish to expose are added to the fe::Library we create. This makes a connection between the C++ class and a string-based specification. This string in described in the Component Writer's Guide.
A similar "manifest" file is used to tell the registry system what components are available in various libraries before those libraries are even loaded. All manifest files that are found are collected together into an "autoload" module. If the autoload module is active during execution, a component creation request can provoke the correct modules to be loaded just at the point when they are needed.
Many of manifest files are built automatically by their corresponding bld.py script, but in this simple case, we can just write the manifest by hand.

Manifest files are fragments of C++, not standalone C++ files. An 'sp<Manifest> spManifest' object (in the fe namespace) is the only object that can be presumed to exist in the scope of a manifest file.
The first string in a manifest line is the component specification, probably exactly what we used when creating the fe::Library, as show in the prior file. The second string is the name of the library, used to find the compiled library on disk.
The last thing we need to create our library is a python file that builds it.
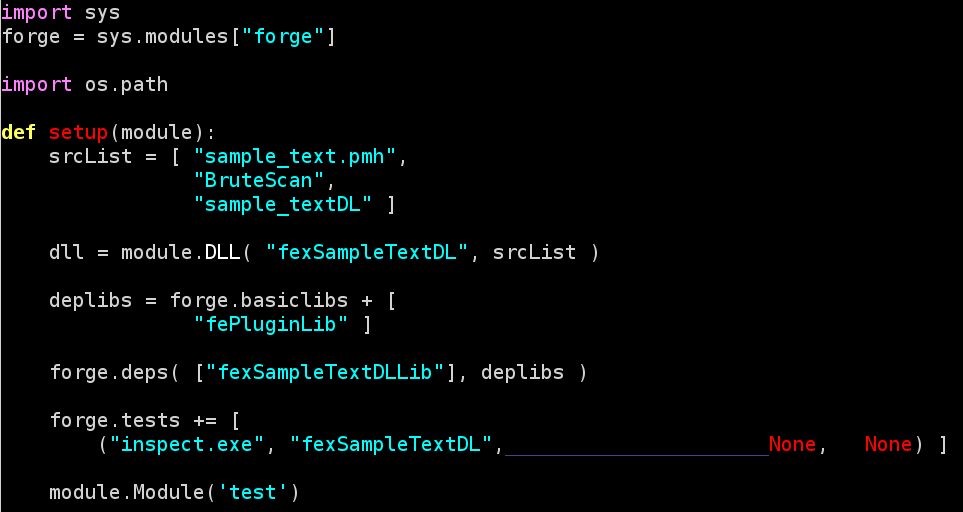
The srcList lists all the source files in the module that need to be compiled. This is mostly '.cc' files, but there is often a '.pmh' file there as well. A header file in the source list will be built into a precompiled header. Many of the '.cc' files in a module will likely use that precompiled version of the header, if found.
A module dll specification is created from this source list. The 'dll' object we get back can be used to add external link dependencies, but we don't need that for this example.
The 'deplibs' object we create lists the FE libraries we will directly link with.
We also add a test to the common 'forge.test' list that will do a basic check of our library during unit testing.
The last line says that we also want to build a test subdirectory, described in the next section.
Unit tests can be run as a big batch process, during or after the main build, but we can also run the individual tests by hand.
In a 'test' subdirectory, we create the source for a simple executable to check that our library works as expected.
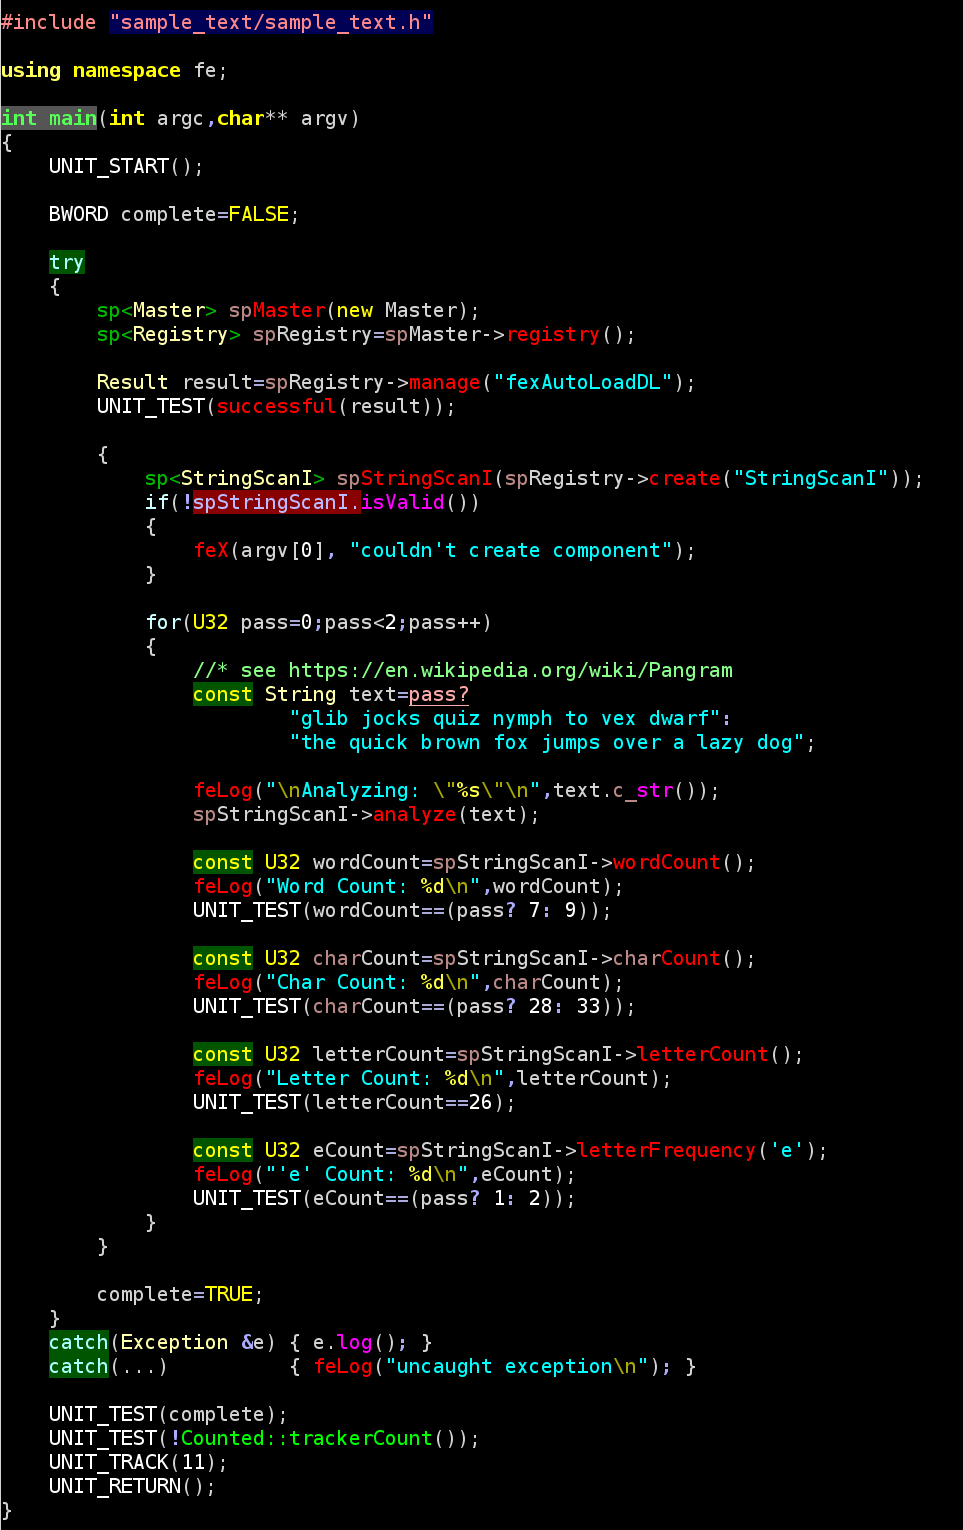
Some of this is just unit testing boilerplate with macros, whose function should be fairly self evident.
Inside the 'try' block that should capture any exceptions, we first create an fe::Master, the central point of contact for the FE system. The fe::Master is not explicitly a singleton, due to some particular use cases, but it should usually be treated similarly, as a unique and special object.
The fe::Master will always have a single fe::Registry, the place to go for creating components. Since we made a manifest with our new module, we just have manage the 'autoload' module and then not worry any more about module handling.
We create our component by asking the registry for anything that fulfills our 'StringScanI' interface. In this case, we are pretty confident that we will get the 'BruteScan' component, but in a more complex system, there could be many candidates, chosen by priorities and other various rules. We could be more forceful by asking for "*.BruteScan" or even "StringScanI.BruteScan", but by being a little but vague, we are allowing an opportunity for another module to provide an alternative implementation for "StringScanI" that may be more suitable for some use case we would not have been able to anticipate.
Once we have our implementation component, we make calls to the interface to check that it works as we intended.
To build our test, we add a bld.py file much like we did for the module itself.
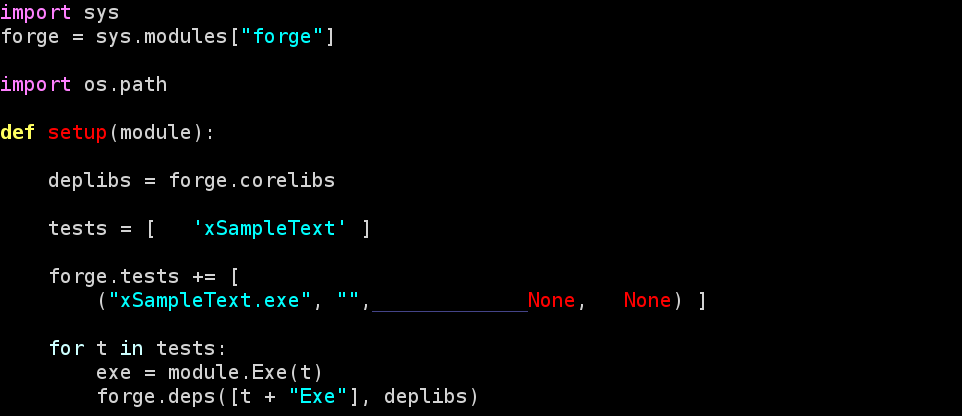
Often, a test submodule has a list of several tests, so we followed an example that is prepared for that.
We also need to tell the build system that we want this new module built. This is done be editing local.py an adding sample_text to the colon-delimited list of modules in the python string variable forge.extensions seen at the top of the file.
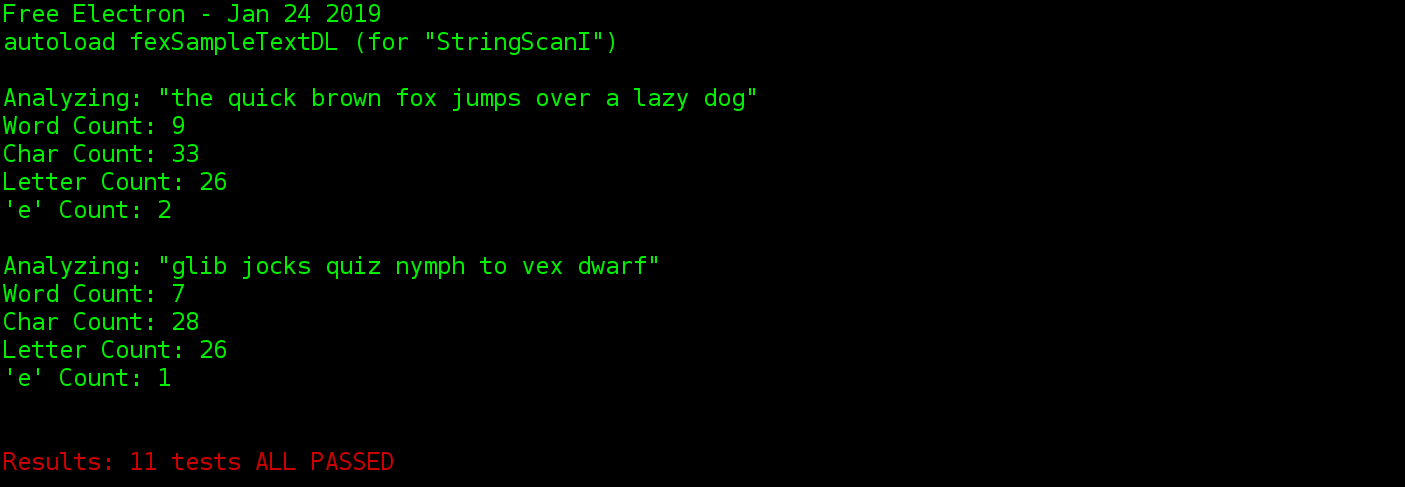
Once we run a new build, we can admire our results.
The executable is placed into a subdirectory of lib/ under the FE root path, named after the particular platform and mode. For a Linux optimize build, you could run the program with:
For Windows, this might be:
 1.8.13